Showing posts with label recipe. Show all posts

Wednesday, June 4, 2014

Raghavan Iyer's Green Mangoes with a Yogurt-Toasted Coconut Sauce from 660 Curries

Gah!  I know it's been over 2 months since I last posted.  My computer died and for a while we thought it was completely kaput, but it turns out some love at the (look-alike) Apple store did it some good ... so now we're up and running and I have a lot of backlog topics I really want to share with you all... so bare with me as I get through it all. 

Last weekend, my husband bought mangoes at the fresh market in Wonsel and while one of them was this delicious, juicy, sweet mango.... the other, unfortunately and disappointingly (!) was not ripe enough.  In seeing that it wasn't ready for eating, I quickly consulted my good old Indian curry cook book, 660 curries... thinking if I was going to find a mango curry, it would only be there!  I was in luck, as you can see from the photo below, and this dish was soooooo delicious!  The combination of the tart and sweet mango with the savory and nutty taste of the coconut flakes and coconut milk were an awesome combination!  There was a lot of heat in this dish which contrasted to the sweetness of the mango and the creaminess of the coconut milk well.  DELISH!

So, here's the recipe: 

Green Mangoes with a Yogurt-Toasted Coconut Sauce


Ingredients: 
  • 2 large green (unripe) mangoes, peeled, seeded, and cut into 1/2 inch cubes (I used 1 green mango, because that's what was available to me and it was slightly ripened... i.e. the flesh had some sweetness, but you wouldn't have found it very good to eat plain)
  • 1 teaspoon sea salt
  • 1/4 teaspoon ground turmeric
  • 2 tablespoons canola oil (I used coconut oil)
  • 1 cup shredded fresh coconut (I used coconut flakes, the were not fresh, but they weren't dried such that they needed to be reconstituted - they are for snacking, but you know.... )
  • 1 tablespoon yellow split peas
  • 1 teaspoon whole black peppercorn
  • 1 or 2 fresh green thai chilies (or whatever type of spicy chili you have available, add to your taste level) 
  • 1 or 2 dried Thai chilies (or whatever type of spicy chili you have available, add to your taste level; I used Italian pepporncini since that's what we currently have in the house!)
  • 1 tablespoon crumbled (or chopped) jaggery or firmly packed dark brown sugar (I used brown sugar)
  • 1/2 cup thick yogurt (I used greek yogurt)
  • 1/2 teaspoon black or yellow mustard seeds (I used black, for no particular reason as I have both)
  • 1/4 teaspoon fenugreek seeds

Directions: 
  1. Combine the mangoes, salt turmeric, and 3 cups of water in a medium-size saucepan and bring to a boil over medium heat.  Continue to boil, uncovered, stirring occasionally, until the mangoes are tender but still firm looking, about 8 to 10 minutes. 
  2. In the meanwhile, heat 1 tablespoon of the oil in a medium-sized skillet over medium-high heat.  Add the coconut, split peas, peppercorns, and the fresh and dried chilies, and stir-fry until the coconut is toasted (brown colored), and the chilies are blistered slightly.  Approximately 5 minutes. 
  3. Drain the mangoes reserving 1 cup of the yellow broth they cooked in. 
  4. Pour 1/2 cup of the reserved mango broth into the coconut mixture and scrape the bottom of the skillet to deglaze it, releasing any browned bits of coconut.  Transfer the mixture to a blender jar and puree until a gritty like past speckled with spices. 
  5. Return the drained mangoes to the same saucepan thy cooked in, and add the coconut paste (I used a plastic spatula - typically used for baking - to get all of the paste out of the jar).  Pour the remaining 1/2 cup of reserved broth into the skillet. Add the brown sugar and stir in.  Cook the mixture over medium heat, uncovered, stirring occasionally (until the jaggery dissolves, if using).  Remove the pan from the heat and stir in the yogurt. 
  6. Heat the remaining 1 tablespoon of oil in a small skillet over medium high heat.  Once warm, add mustard seeds and cover quickly.  Allow the mustard seeds to stop popping and then add the fenugreek seeds.  The fenugreek seeds will quickly brown and emit a nutty smell.  Remove from heat and pour over the curry.  Stir to combine and serve! 

I looked in the book for a recommendation of what to serve this curry with and didn't find anything.  I ended up choosing white rice, which worked out really well as it mopped up the curry pretty well without changing the taste of it! 


Hope you try it!  Happy curry-ing!

Friday, March 28, 2014

Chicken with Almond Yogurt Sauce (Chicken Korma) from 660 Curries

Update: March 28, 2014

I remade this recipe after I went out and bought blanched almonds.  I also took more time blending (I used an immersion blender as you can see from the photo below) the 'curry' through so there weren't large chunks of almond.  The immersion worked well to blend through the whole spices (peppercorn, cardamom, etc.) as long as I gave the mixture time to blend together.  I think this recipe turned out a lot better, packed with flavor and not weighted down from the skins of the almonds.  

You can blanch your own almonds by soaking them in room temperature water overnight and peeling the skins the next day.  Alternatively you can buy them and if you don't have a powerful blender, consider buying them slivered, this will help immensely!  

I used cut cub chicken breast again instead of a whole breasts. I used cinnamon powder (which I bought at our local Persian store and which is very strong) instead of cinnamon stick since I needed to use it up.  I used green cardamom pods instead of white (I don't find a flavor difference here, I think it's used for appearances as in if you were going to use cardamom powder in a cake or frosting... anyone out there know?). 

Blending the curry.  Used the immersion blender and blended for a good 5-8 minutes to make sure everything was blended together and evenly.  Whole spices were blended in this mixture as well. 
Chicken curry cooking, with reduced sauce.  Very mud-like.

Dinner is served (over white rice)

Enjoy!
_____________________________________________________________

Original Post:

Trying to get back onto the bandwagon of posting food recipes.... so here goes my first food posting of the year! 

While this was not my favorite curry recipe from 660 Curries by Raghavan Iyer, it's nevertheless worth a post since it's an interesting dish.  It happened that the next day, as I was reading, Curry: A tale of cooks and conquerors by Lizzie Collingham, I also learned a little about its origins and how the curry became as it is today.  According to this book, Indian cooking was heavily influenced by Persian cooking techniques.  For korma, the concept of marinating the meat in yogurt with spices (the first step of this recipe) was a Persian one.  The Mughals ('kings' ruling regions of India) brought food influenced by Persia and central Asia added spice to the marinade/dish.  The Mughals would not have used chilies, but as chilies made their way from South India to North India, they eventually were incorporated (chilies originated from the Portuguese who brought them to Goa, India... fascinating stuff!).  The chefs of Lucknow (another region in India), added cream to everything which was also eventually incorporated into this dish.  In this case, the marinade in the form of yogurt, but in other cases, actual heavy cream is used to thicken the curry.  In this particular dish, ground almonds is used to thicken the cream, which is also a Persian influence.  

I love that I'm getting  dose of history as I make these curries, it makes it so much more fun to cook.  

Ingredients: 

1/4 cup yogurt (I used greek yogurt)
1 thumb sized piece of ginger, minced (recipe calls for 2 tablespoons of ginger paste which is a lot of ginger and water ground together than can be stored in your fridge for use whenever... I don't do this)
3 cloves of garlic minced (1 tablespoon of garlic paste - same as above) 
1 kilo (2.2 pounds) of chicken breast (recipe calls for 3.5 pounds) cut into cubes
2 tablespoons of olive oil (recipe calls for canola oil)
1/2 teaspoon of whole cloves
1/2 teaspoon of black peppercorns 
6 green or white cardamom pods (I used white)
3 black cardamom pods (I bought these at Penzeys)
3 cinnamon sticks (each 3 inches long)
2 fresh or dried bay leaves (I used dry)
1 medium sized red onion, cut in half lengthwise and thinly sliced
1/2 cup of slivered blanched almonds (I did not blanch them, next time I would try this)
1.5 teaspoons cayenne pepper 
Fresh cilantro chopped for garnish

Directions: 
  1. Blend together the yogurt, ginger and garlic (use a small amount of water if you find it too thick or regular yogurt as opposed to greek yogurt which is very thick) in your blender or a small bowl.  Cover the chicken pieces with the yogurt blend and refrigerate, covered overnight (you could also do this for a shorter amount of time, ~ 1 hour if you are limited on time) to marinate the chicken.  
  2. Heat the oil in a large skillet over medium-high heat.  Add the cloves, peppercorns, green/white and black cardamom pods, cinnamon sticks, and bay leaves.  Cook until they sizzle and smell aromatic (~recipe calls for 1-2 minutes).  Do not let the spices burn. 
  3. Add the onion and cook until they are light brown, about 5 minutes.  Transfer the onion and all the spices to your blender jar and port in 1 cup of water.  Add the almonds, salt, and cayenne.  Puree until blended together forming a gritty solution, not quite paste-like, but it could be if less water was present. 
  4. Place the chicken including any marinade in the skillet and cook over medium-high heat.  I find that there ends up being too much water so I use a paper towel to soak up the water. Cook until the chicken is browned. 
  5. Add the onion paste to the skillet.  Pour 1/4 cur pot water into the blender jar and wash out the remaining almond solution.  Cover the chicken in the curry completely, make sure all pieces are covered.  Once it starts to bubble (like mud!), reduce the heat to medium-low and cover the skillet.  Occasionally stir the mixture ensuring all chicken pieces are cooked evenly.  Cook until the chicken is fully cooked (which I check by taking out a thicker piece and cutting it at the thickest portion to see if the inside is white). 
  6. Sprinkle the cilantro over the curry for garnish.  Serve with rice. 


To be totally honest, while the curry has lots of flavor and included new spices (white cardamom) and techniques (ground almonds to make a thick curry), the dish was not novel to my palate.  I do want to re-try this recipe with blanched almonds (without the almond skin), I think this could lighten up the curry a little.  Perhaps a fresh squeeze of lemon would give it some brightness, but then it might change the flavor profile altogether.  

Regardless, I wanted to post this recipe as I think it could be fun for those willing to try.  If you do, let me know how it goes! 

Happy Currying! 

Tuesday, January 21, 2014

Sarah B's Butternut Squash Lasagna from My New Roots

As of today, it's been a week and 2 days since we've been detoxing.  We're detoxing not by counting calories or cutting out all sugar, but by eating, whole foods, organic (as much as is humanly possible without breaking the bank!), and working on eliminating gluten, dairy and processed, preserved, and refined products (think: white sugar, stuff out of a can or jar with unknown ingredients, cooking beans and whole grains instead of using canned versions, etc.)... and the kicker... coffee.  We cheated on the coffee part a little bit and didn't give that up until week 2, but so far so good.  I've been able to fully replace coffee with this masala chai recipe!

Since starting this detox, the My New Roots blog has surprisingly become my new friend!  I was always slightly scared by Sarah B's recipes, they were a bit 'hippie' and awfully healthy sounding ... I always figured I wouldn't like the taste of any of her vegan friendly foods.  Much to my surprise (and pleasantly so), since starting this detox I have found a lot of week night friendly and tasty meals that are not only great for this detox, but will be great for general week night meals well after this detox is over.  Take a peak and don't be too scared... ease your way into the more 'hippie' ingredients if you're not into that stuff yet and you'll find Sarah B's blog quite useful!

Since this detox is 3 weeks long and we're doing it with friends (whose idea it was in the first place :D) who live nearby, I wanted to have a Saturday evening that was detox friendly, but still encouraged the spirit of sitting down together and having a meal.  Browsing through this blog I found Sarah B's recipe for Butternut Squash Lasagna (no, it does not use pasta noodles, tomato sauce, or an alfredo sauce) that I thought would be perfect for a Saturday night.

Ingredients:

For the butternut squash sauce:
2 butternut squash (about 2 kilos in total)
3-4 cloves of garlic
1 tablespoon of olive oil
1 teaspoon of lemon juice
sea salt to taste

For the Celeriac 'Noodles':
600 g celeriac (yes, I weighed it out)
vegetable broth

Bean 'Bechamel'
2 cups of white beans (I used cannellini)
nutmeg grated to taste
1 tablespoon olive oil
1 teaspoon lemon juice
pince of salt
1/4 cup of water (recipe indicates you could use up to 1/2 cup)

spinach

Directions:

Prepare each the Butternut Squash Sauce, Celeriac Noodles and Bean Bechamel separately.
Layer the lasagna starting with the celeriac noodles, followed by a thick layer of butternut squash sauce, followed by a thick layer of spinach, followed by a topping of the bean béchamel (this will be a little difficult to spread, drizzle it over the spinach), and repeat.  Have the last layer consist of the celeriac noodles and butternut squash sauce with a sprinkling of freshly ground black pepper.

Butternut Squash Sauce Directions:
1. Cut the squash in half and place on baking sheet.
2. Warm some coconut oil in the oven and bring to liquid form.  Once liquid, brush over the squash and sprinkle with sea salt.
3. Cook in the oven at 400F (200C) until soft, about 40 minutes.
4. Remove from oven and let cool.
5. Scoop out the the flesh and add to food processor or mixing bowl with remaining ingredients.  Process or mash (I used a potato masher) until a mixed thoroughly.  Season to taste.

Celeriac Noodles Directions:
1. Peel the celeriac root with a peeler.  Trim off the bottom roots.
2. Cut the noodles into think sheets, about 1cm thick. You can either keep the natural shape of the vegetable or shape it so that it makes square/rectangular sheets.
3. Braise sheets in vegetable broth for 3-5 minutes.  Cook until al dente, not mushy. Drain and set aside for use (save that vegetable broth for something else, you've just enhanced the flavor!)

Bean Bechamel Directions:
1.  Drain and rinse the beans (if canned, if cooking from dry beans cook to taste)
2. Put all ingredients and 1/8 cup of water in the food processor and blend.  Add more water up to 1/4 cup until desired consistency is reached.  It should be creamy, smooth and spreadable.

Once assembled, bake at 350F until all vegetables are warmed through and cooked to desired consistency.  All it to cool slightly and serve.

Here are some photos to share from our experience.


The full pan of 'lasagna'

My portion of dinner, it sort of fell apart, but it was yummy!

Anybody else out there on a diet after the holidays?  How's it going?  Are you trying anything you think you'll be able to maintain long term?

Happy Eating! 

Wednesday, August 21, 2013

Baba Ghanouj Twisted

Living in Eindhoven means we are surrounded by more expats (typically from the U.S., but sometimes other areas) than Dutch on some occasions.  Large, global companies such as Philips, ASML, and Merck exist here sustaining the economy and much like Minneapolis, generate small spin off companies that ultimately bring people in like my husband to bring in knowledge/experiences that are typically unknown in the region.  One of Matthew's co-workers has been here for a slightly longer time, and while he lived in the U.S. for quite some time, he's originally Persian.  His wife, also an American has taken to Persian cooking, but what I love about her cooking is that it's a bit of a fusion with some of favorite ingredients incorporated (in this recipe sun-dried tomatoes and basil).  Anyway, we had them over for dinner one night and she brought some Baba Ghanouj to gobble before dinner and I fell in love with it.  I've adapted her recipe a bit to fit the ingredients I had, but it's such a great dip and as I've found this week, perfect for lunches.

Note, this recipe is not very prescriptive with respect to the ingredients, the key is getting good eggplant flavor, but then season it as you like.

Ingredients: 
2-3 medium sized eggplants (I prefer the dark purple kind - the flavor is richer as compared to the white/purple stripped kind)
olive oil (about 1/4 cup)
1 small white or yellow onion
1 tablespoon (approximately) of tahini (I used a small spoon I use for coffee - so, really it's an approximate and a taste measurement). 
2-3 cloves of roasted garlic (you can also use raw garlic, but it will be a bit more 'raw', similar to pesto)
3-5 sun dried tomatoes (make sure you know the salt content of these first; chop these a little bit to facilitate the blending process)
a handful of cilantro and/or parsley (note, I only used cilantro - use as much or as little as appeal to your taste buds)
a handful of basil (use as much or as little as appeal to your taste buds) 

Directions: 
1. Grill or broil the eggplant until the inner meat of the eggplant is very mushy and soft
   (My husband graciously grilled the eggplant for me.  While the coals were heating (mostly white, but not fully hot) he allowed the skin of the eggplants to char (but the meaty inside was still pretty firm), then I wrapped the eggplants (2 -3 per pack) in aluminum foil and he buried the wrapped whole eggplant in the coals as they continued to warm up.  This gave the eggplant a sort of campfire roasted flavor which I found delicious). 

2. Once the eggplant is cooked, unwrap from the aluminum foil and cut into thirds and place in the blender.  The eggplant will be difficult to handle as the foil and eggplant will be very hot, be careful!  The only reason to cut into thirds is to accommodate a smaller blender, if you have a larger one you may be able to skip this step. 
(Note, I left the skin on as I wanted to preserve the charred flavor.  Similar to hummus, if you want a smoother texture scrape out the cooked eggplant meat and leave the skin behind) 

3. In a blender, add the olive oil to the eggplant and blend until few clumps are present (it doesn't need to be completely smooth for this step).  

4.  Add the remaining ingredients except for the salt and blend until smooth. 

5. Taste the mixture and add salt to taste.  Blend to combine any additional salt added. 

6. Serve with bread, pita slices, crackers, or whatever else you like.

This is a photo of the leftovers for my lunch today, it's not very pretty.  If you want a smoother Baba Ghanouj use the full amount of olive oil the recipe calls for, this version shown in this photo contains less (I eye-balled it). 
Enjoy!!!

Sunday, June 30, 2013

White Asparagus Risotto

I'm a believer in complete, full meals on the weekends.  While we haven't quite converted to actually eating at the dinner table, weekend meals for us, are usually complete, carefully prepared, and sometimes are a joint venture between my husband and I. This recipe is one I picked up living in Italy, but I actually cooked it in the oven.  As our apartment here doesn't have a proper oven, I've actually taken to making this back on the stove, as traditionally is done in the Italian way. We ate this for our Sunday meal and it was a nice treat.  Traditionally prepared risotto takes time... you must be patient with the rice and you must continuously stir the mixture, coaxing the rice to absorb the liquid, slowly but surely.  White asparagus are a Holland treat, these are a bit out of season as asparagus are a spring vegetable, but since the season is a bit late and it's still cool-ish here, they seemed appropriate to buy at the market.  This recipe can also be prepared and is much brighter with green asparagus or spring peas.

Ingredients: 
1L vegetable or chicken broth
20-30 white asparagus stalks, cut into bit sized pieces (green asparagus works for this recipe too)
2 cups of uncooked risotto rice
1 small shallot minced
1-2 tablespoons of butter
2/3 cup (up to 1 cup) of white wine (that you would drink)
1 cup of freshly grated Parmesan
salt and black pepper to taste

  1. Prepare the vegetable or chicken broth, after it comes to a boil, keep it warm on your lowest setting on the stove. 
  2. Melt the butter in a large saute pan.  Once the butter begins to sizzle, add the shallots and salt (be careful here depending upon how much salt is in the broth) and freshly ground pepper.  Saute until the shallots are translucent or beginning to brown, but not burned (3-5 minutes). 
  3. Add the chopped asparagus and saute until fork tender (I like mine with a little crunch still there, so this didn't take more than 5-7 minutes).  
  4. Once asparagus are cooked to your liking, remove from the pan and set aside. 
  5. Add the risotto into the same pan and allow the 'raw' rice to cook for 1-2 minutes (no extra butter/oil is needed here) on medium-low heat. 
  6. Add one ladle full of broth and allow the risotto to soak up the broth slowly (keep cooking on medium-low heat).  Once the broth is mostly absorbed by the risotto (when you push the risotto in the pan, liquid should slowly cover the spot where you pushed the rice away from, there should be very little to no liquid that the rice is swimming in). 
  7. Add the wine and cook in the same manner as described in step 6. 
  8. Once the wine has mostly cooked away (similar to as described in Step 6), repeat with the remaining broth, 1 ladle full at a time until the risotto rice is cooked al dente. 
  9. Add the cooked asparagus and Parmesan and stir together with the risotto rice.  Serve immediately with extra Parmesan and black pepper for garnish. 


This is one of my favorite weekend meals, it's comforting and it's a great way to use fresh spring vegetables (yes, even in end June! ...).  If you give it a try, let me know what you think! 

Saturday, June 22, 2013

Homemade Tomato Sauce - Italian Style


My all-time favorite recipe I picked up while living in Italy was a recipe for homemade tomato sauce.  Up until moving to Italy, tomato sauce for me was something that came out of a can or jar, a typical American approach.  As a result, dinners of spaghetti and meatballs, or pasta and red sauce were not my idea of a good meal.  After only a few short months in Italy, I came to the realization that tomato sauce was a staple in Italy and could be AMAZING, especially when made from scratch and even more especially when tomatoes were in season (August/early September). I originally started making tomato sauce, no matter what time of year, throwing cubed tomatoes in a pot (if you have a good, sharp knife it will go fast), allowing them to cook down with some olive oil, garlic and basil and then pouring the cooked sauce over al dente pasta or baked eggplant.  I would leave the skins on and seeds in and use our hand blender to combine everything together.  I still do this (with some variations – see recipe below), especially since there's a lack of storage space around here, but the one time we had the opportunity to make it the true Italian way was something I will never forget.  My husband and I joined his boss (at the time, anyway) who learned this from her former mother-in-law, an Italian. While she has passed away (the mother-in-law that is), her traditions have been passed on, albeit to a set of expats.  In this true Italian method of making homemade tomato sauce, we had cartons full of fresh, in-season tomatoes (ideally, you should use San Marzano’s), a huge cooking pot, a little gas burner, a de-seeder and de-skinner (electrically powered, although these are also manual as well), leaves of basil, copious amounts of coarse sea salt, and sterilized canning jars.  We started off by weeding out all the bad tomatoes and halving the good ones, throwing them into the huge pot sitting over the gas burner.  A handful or two of salt was thrown in and they were allowed to cook down until half or more of the water boiled off.  Next, the mixture was put through the de-seeder and de-skinner, and the final mixture was canned with a leaf or two of basil leaves.

The recipe to follow is the homemade tomato sauce I use on an almost weekly basis.  It's a good substitute once all the jars of the real stuff you made at the end of summer are finished.  This recipe serves as the base for seasoned sauces such as marinara, amatriciana ('spicy' Italian tomato sauce), or even simply roasted garlic and basil.  


Ingredients:
1 kilo tomato of tomatoes (use as much as you have, just be sure to accommodate the salt content)
Salt (course if available)

1. Chop tomatoes coarsely (approximately 1 cm x 1 cm x 1 cm in size) and put into a large stock pot.
2. Add a couple a couple of small handfuls of salt (it's better to go less than you think here because when you finish the sauce with whatever seasonings you want, you can add more salt)
Chopped tomatoes
 
Chopped tomatoes, coarse sea salt, just before cooking

3.Turn the heat to medium-high and allow the tomatoes to become soupy (very watery - that's ok!)
4. Turn the heat down to medium and stir occasionally to lift the goodness that collects at the bottom of the pot (if it's black or brown, you're burning the tomatoes and you don't want that, turn the heat down).  
5.  Cook until the sauce is half the amount of the chopped tomatoes (about 45 minutes).  Taste for salt and adjust as necessary. 

I typically season my tomato sauce by roasting garlic in a little bit of olive oil (heat olive oil, once warm, turn down to low and add the garlic - allow the garlic to roast in the oil, it will turn a golden brown), add the raw tomato sauce and basil and allow to cook together (low heat) until your pasta is ready.  

Buon Appetito!


Saturday, June 15, 2013

Lusia Weiss's Potato Salad (Kartoffelsalat)

I've made this dish for the past couple of weeks in a row.  Those of you that are linked to me on facebook have seen the images (I think for a couple of weeks in a row... eek!).  Here's the recipe finally, my apologies for the delay in posting this one.  

This recipe is taken from Luisa Weiss (author of this blog) book, My Berlin Kitchen.  The Dutch are  quite particular concerning their potatoes and since they are eaten as a staple here, they command much attention.  As a result, we have had the pleasure of trying new varieties from the local farmer's market and I use this recipe and will continue to do so to determine if the new variety of the week suits our taste buds.  I suspect, similar to our mozzarella di buffala needs, we will become quite snotty in the way of choosing potatoes... well... there are worse things in life.

This recipe is easy and saves well (if it lasts in your household) throughout the week.  I also think this would be a great recipe for an outdoor cookout or family grill night.  


Ingredients: 
1/2 kilo of potatoes (or about 1 lb of potatoes - choose a variety and see what you think, I haven't found one in particular I'm ready to recommend)
3.5 tablespoons unsalted butter (this can be reduced if desired, but you will need some... )
1 shallot, finely chopped (Lusia calls for 2 yellow onions, finely chopped - I tried this the first time around and wasn't a huge fan of the onion texture or flavor in this dish, the shallot offers much more of a muted flavor and of course, integrates well into the white wine)
2/3 cup of white wine vinegar (this can be reduced, but not by much...)
1 and 1/3 cup of vegetable broth (Lusia calls for beef or chicken broth - I am sure the flavor is enhanced, espeically if you use homemade broths.  If not, a cube combined with water works just fine)
2 tablespoons of mustard (Luisa calls for Dijon, I have been using whatever is in my fridge, use whatever you like, but I would recommend you stay away from something like French's mustard)
3 tablespoons of olive oil (Luisa suggests sunflower oil could be used as well, I haven't tried this)
Freshly ground black pepper
2/3 cup loosely packed flat-leaf parsley, minced. 

*Note, I doubled the sauce (/marinade) recipe from Luisa's recipe since we prefer this salad a little more flavorful... if you prefer a more subtle flavor, half all of the marinade ingredients, except for the shallot.

Directions:
(Note, these are my directions, based on Luisa's recipe from her book).

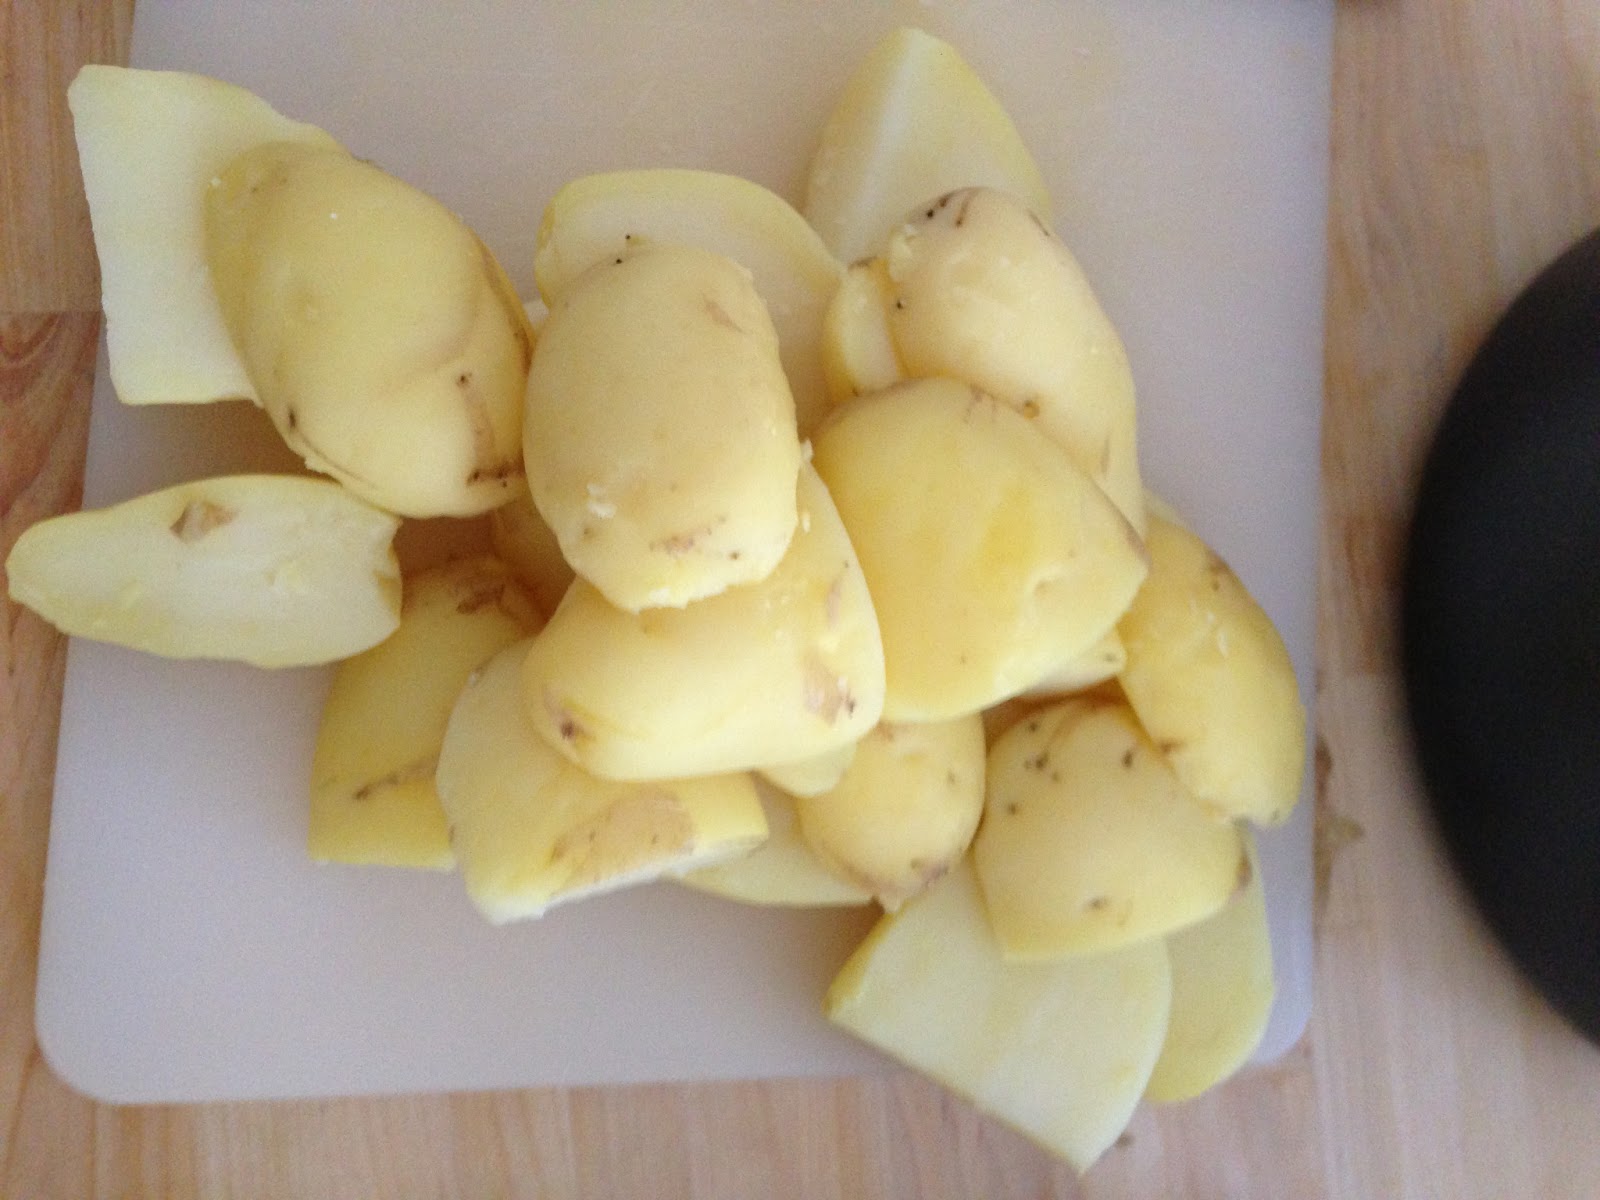
1. Wash the potatoes and cut the potatoes in half (for the large ones I cut them in quarters) the long way. 

2. Place the cut potatoes in cold water that has been salted (I use large grain salt, but fine grain would be fine; use as much salt as you would when you salt pasta water).  Boil them (allow the potatoes and the water to come to a boil together) until they are fork tender (the fork should slide through, but experience a little resistance - check this using the thickest potato in the pot, about 20 to 30 minutes of total cooking time, including the time it takes the water with potatoes to come to a boil).

3. Once tender, drain the potatoes and allow them to cool.
4. Peel the potatoes and cut them into bite size cubes and place into a serving bowl. Set aside the potatoes.

 
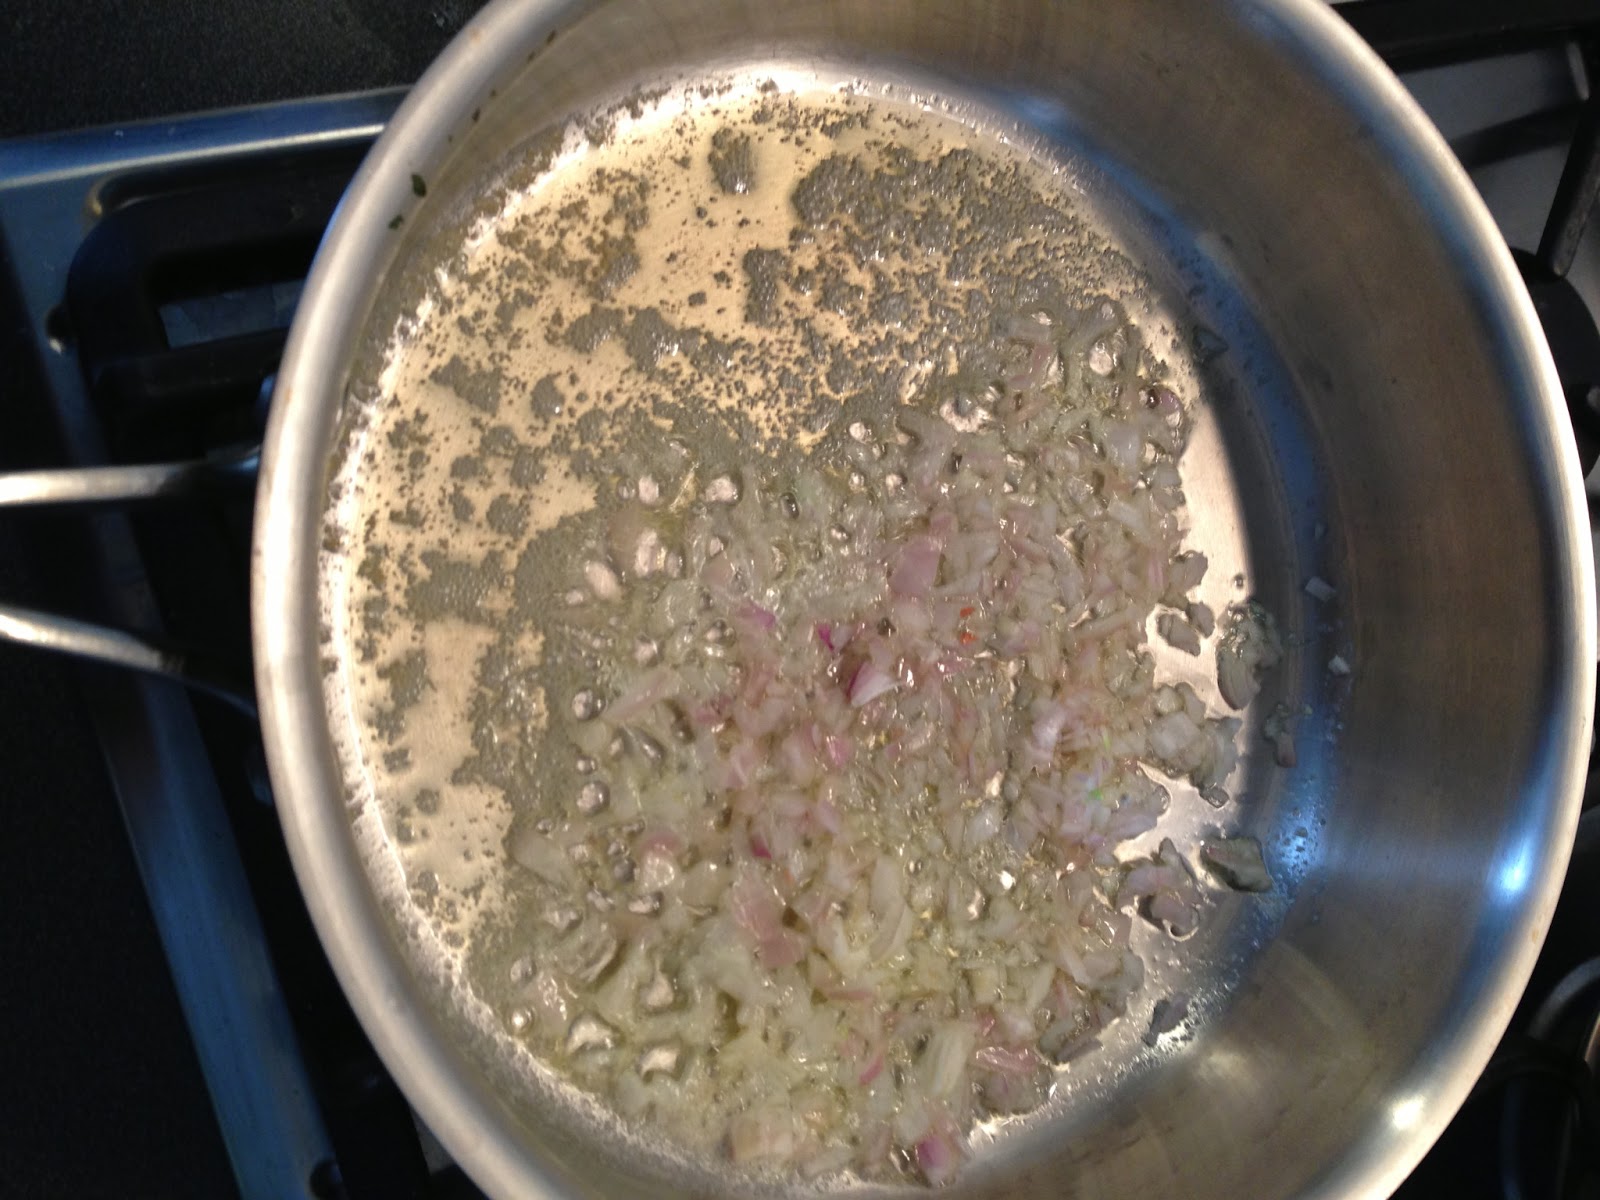
6. Melt the butter in a saute pan and add the shallots.  Mix well and cook for 3 minutes (I actually used a timer for this and the time seems appropriate) over medium heat. The shallots should begin to loose their color, but not brown.

 
7. Pour in the vinegar and then the broth.  Add the mustard and stir well.  Let the mixture simmer over low heat for an additional 3 minutes (I also tried this time and it seems appropriate).

8. Pour in the oil and wisk the sauce together.
9. Pour the hot marinade over the chopped potatoes.  There will be some extra sauce left and it may take some time for the potatoes to soak up the rest of the solution. 

10. Add the minced parsley and mix well.  Taste for seasoning (add more salt and freshly ground pepper as desired) and serve.


Lusia mentions a couple of variations which I think are worth mentioning, but I have not tried them myself.  She recommends adding bacon on Speck, which you can fry in the butter (she indicates to reduce the amount of butter by a tablespoon) before adding the shallots/onions.  I think you could also do this after the salad has been made and mix it in once the meat is cooked.  She also suggests adding diced French cornichons to the salad to 'bump up the sour, crunchy factor' - maybe a great option for a hot, summer day.

I hope you try this recipe and please let me know what you think!

Sunday, June 2, 2013

Luisa Weiss's Braised Endives

I cannot sing the praises of this dish enough, it's a must try and a great way to try a new vegetable you may have never tried before (I certainly had not!). I found this recipe in Luisa Weiss' book, My Berlin Kitchen: A Love Story (with Recipes) who writes this blog that I have been following for a couple of years.  

Ingredients: 
2 endives (Luisa calls for 3 or 4 Belgian endives)
3 tablespoons of olive oil
pinch of sugar
salt and freshly ground pepper to taste
juice of 1 lemon
1 tablespoon of butter (optional; note, I did not use this)

1. Wash and dry the endives and pull off any discolored outer leaves.  Cut them in half lengthwise and trim off the root end, but leave the root end intact.  Cut out the inner core (I struggled with this part, I wasn't exactly sure what consisted of the inner core... you can see in the photo what I removed, but I think more needed to go since it was difficult to cut through while eating). 

2. Heat the olive oil in a heavy, lidded 3-quart saute pan over medium heat.  Put the endives, cut side down, in the pan.  Let the endives cook for 3 to 5 minutes on each side, letting them brown but not burn. 


3. When all the endive halves have been browned on both sides, sprinkle them with sugar, salt and pepper.  Let the sugar melt for a few seconds (I never really observed this, it was more or less immediate - however I probably could have used more sugar... it's difficult to judge what a pinch means!).  Then add the lemon juice, immediately turn the heat to low, and cover the pan (While I used the juice from one lemon, there wasn't much liquid.  Usually braising means the item simmers in a liquid, but since there wasn't much liquid from the lemon and recipe does not call for any other liquid, I was concerned.  After consultation of other braised endive recipes and my husband, it seems this is ok and it turned out great, so don't be worried if there isn't much liquid).

4. Let the endives cook for 15 minutes.  They should be fork tender and caramelized (my endives were large, so they took 30 minutes).  Remove the endives from the pan and put them on a serving plate.  Raise the heat to medium and reduce the cooking juices int the pan to a think syrup, sitting for 2 to 3 minutes (since I didn't have much in the way of extra sauce, I added less then half a ladle of vegetable broth and let it reduce for a little while, not more than 5 minutes).  If you want a richer sauce, add the tablespoon of butter to the pan and stir it in until it has melted and emulsified, creating a silky sauce, an addition 3 to 5 minutes (as per above, I did not use butter).  Pour the sauce over the endives and serve immediately.


Endives are known to be bitter uncooked... braising makes this vegetable much more approachable.  The combination of the sugar and lemon juice draws away the bitterness and the caramelized sides bring a nice roasted flavor to the dish.  The centers of these endives were artichoke heart like, smooth and silky. Enjoy this dish if you try it ... I would love to hear what you think!

Sunday, May 26, 2013

Cream of Mushroom Soup

Saturday's mornings here in Eindhoven mean trips to the farmer's market.  When we lived in Italy, the year round farmer's market near our apartment was a every other day adventure for me and weekends were left to the big farmer's market in the center of town (many claim it's the largest open air fresh market in Europe, but I'm not sure about that).  Anyway, at the Eindhoven market we've been pleasantly surprised by the mushrooms and for a few weeks were buying up as many shitake mushrooms we could find and adding them to our pasta with tomato sauce (likely to be it's own post!).  Last week, the shitake's seemed past their prime, so we moved onto the cremini mushrooms, purely chosen for the scrumptious looks. Since I was feeling burned out on the mushrooms with pasta and tomato sauce combination, I decided to reach back into my 'vault' of starred recipes and make a cream of mushroom soup, adapted from this recipe.  I did not make a vegan version, but honestly it's on my list to try the vegan version (not because I aspire to be vegan, but because it sounds good!)... I will let you know how it turns out!

By the way, I think this soup would make a fantastic opening dish for Thanksgiving dinner... we're thinking of adapting it into our usual menu, but only time will tell if that happens :P

Cream of Mushroom Soup  (adapted from Joy the Baker, a blog I highly recommend you add to your reading list)

Ingredients: 

2 tablespoons olive oil
1 medium yellow onion, chopped
3 garlic cloves, minced
1 pound cremini mushrooms, cleaned and sliced
1 tablespoons soy sauce
1 tablespoon Worcestershire sauce 
coarse ground black pepper
3 cups vegetable broth
salt to taste
3/4 cup half and half or cream (check blog link for vegan instructions)


1. Chop a medium sized yellow onion and mince 3 cloves of garlic.


2. Wash 500 grams of cremini mushrooms and slice. 


3. In a large pot, warm 2 tablespoons of olive oil on medium-high heat.
4. Add onions and saute in oil until translucent and slightly browned. 
5. Add garlic and saute for 1 minute. 


6. Add sliced mushrooms, soy sauce, Worcestershire sauce (do not skip the soy and Worchestershire - the aroma is heavenly!), and black pepper and allow the mixture to cook for 5 minutes. 


7. Next add 3 cups of vegetable broth and allow the mushrooms to cook at a simmer until tender when stabbed with a fork. Approximately 10 minutes, but the best way to judge in my opinion is with the fork.


8. Once cooked through remove from heat. Using an immersion blender, blend the concoction. Alternatively you can use a food processor, check blog instructions for how to do this.


6. Add 3/4 cup (or as much as desired) of cream as much as  to the mixture. I added less than 3/4 cup (eye-balled it) since 3/4 cup seemed like a lot, this is a personal taste, how much creaminess to mushroom-ness you like.


The blog indicates to strain the soup to remove the clumps from the soup, but I prefer it clumpy so it was served like this.

I hope you try this recipe, it's fantastic!


Monday, May 20, 2013

Pork Meatballs in Broth

I tried another recipe on Friday night, adding more diversity to our weekly menu.  I used a recipe from this blog which also links back to a blog she was inspired from.  This recipe is a version of Nigel Slater's (apparently a well known chef in the UK) Chicken Broth with Pork and Kale from his book Tender. Um yeah, I need to do some more research on Nigel Slater.

Variations I made in comparison to the two blogs linked above are: I used vegetable broth from Eatly (still have some leftover!) instead of a homemade broth.  My chilies were green instead of red (not sure it matters, you want something spicy, but not overwhelming), I did not add kale or zucchini, just plain old meatballs and broth. I fried my meatballs as directed by the original recipe, but deviates from the original blog I found this from.  It would be worth trying simply steeping the meatballs as this cuts down the amount of cooking time and fat in the dish.  As I'm not very savvy in picking meat here in the Netherlands, I suspect I used full fat pork meat... would be worth seeing if I can get a leaner meat as well.  

Pork Meatballs in Broth
1. Add pork into a large mixing bowl
2. Finely chop chilies and add to mixing bowl
3. Slice scallions (discarding the roots and very darkest tips of the leaves) and add to mixing bowl. 
4. Mince the garlic and add to mixing bowl. 
5. Chop mint and parsley (I included the stems of the parsley, but used only mint leaves) and add to the mixing bowl (note, I chopped coarsely per blog's instructions, I will be modifying this the next time and chopping finer). 
 
6. Using your hands, mix thoroughly and form meatballs (recipe recommends 1.25 inches in diameter, basically make them bite size or whatever size is comfortable for you. I plan to modify the next time and make them much smaller). 
7. Bring the vegetable stock to a boil (season additionally if needed).  
8. Heat a thin slick of oil in a pan (I used a stainless steel pan, you can also do this in a cast iron pan) and cook the pork balls until each side has been cooked (and browned slightly).  Not more than 5 minutes. Cook in batches as needed. The meatballs do not need to be fully cooked as they will cook further in the broth.
9. Lower the cooked pork balls into the broth and cook on a low-medium heat for 5-10 minutes until the pork balls are cooked through (I checked by pulling one out and cutting through to check for pink meat).  Serve immediately. 


You can see some of the herbs fell loose from the meatballs, one reason to chop finer to more easily incorporate the ingredients.  On the other hand, we actually liked the herbs floating around as it gave a nice flavor to the broth combined with the richness of the meat.  You can make the meatballs ahead of time (I had them prepared a couple of hours before I fried them up)... I would imagine they could be frozen, but I haven't tried that yet myself. 

The flavors of the spicy chilies combined with the mint and parsley came through beautifully in this recipe.  After letting the broth sit for a while, the spicy chilies became more pronounced in the broth which was a lovely touch.  I especially loved getting bits of mint and I think this recipe would do well with a touch of cilantro too! If you are looking for something new, this is a great recipe.  Compare with the other blogs I've linked to to see how you would like to make your soup!


Saturday, May 18, 2013

Basil Deviled Eggs

At the friendly nudging of my husband, I've been trying to incorporate new foods into our weekly menu more often. I track many food blogs and through Google reader (for the moment) star those that sound interesting to me. Correct or not, I choose recipes based on my access to the ingredients listed, its general ease (n techniques I am familiar with or willing to learn), and how good it sounds (unfortunately I am also influenced by the food photos too).  This recipe is from this blog, which I only started following recently, however rather than pesto I used a basil and olive oil blend. Obviously you could tone down the amount of basil here, but as it turns out I really enjoyed the massive amount of basil!


1. Blend basil and olive oil. 

2. Hard boil eggs for 9-10 minutes if you want them to be a little underdone like mine. I used my fingers to remove the yolk and they peeled out just fine even though they were slight underdone. 

3. Scoop out the yolks and add them to the basil-olive oil blend.

4. Add a spoonful to each egg and you have basil deviled eggs!


Personally, I think these would be fun for Easter, and you could easily tone down the basil for a more pastel green.