Sunday, May 26, 2013

Cream of Mushroom Soup

Saturday's mornings here in Eindhoven mean trips to the farmer's market.  When we lived in Italy, the year round farmer's market near our apartment was a every other day adventure for me and weekends were left to the big farmer's market in the center of town (many claim it's the largest open air fresh market in Europe, but I'm not sure about that).  Anyway, at the Eindhoven market we've been pleasantly surprised by the mushrooms and for a few weeks were buying up as many shitake mushrooms we could find and adding them to our pasta with tomato sauce (likely to be it's own post!).  Last week, the shitake's seemed past their prime, so we moved onto the cremini mushrooms, purely chosen for the scrumptious looks. Since I was feeling burned out on the mushrooms with pasta and tomato sauce combination, I decided to reach back into my 'vault' of starred recipes and make a cream of mushroom soup, adapted from this recipe.  I did not make a vegan version, but honestly it's on my list to try the vegan version (not because I aspire to be vegan, but because it sounds good!)... I will let you know how it turns out!

By the way, I think this soup would make a fantastic opening dish for Thanksgiving dinner... we're thinking of adapting it into our usual menu, but only time will tell if that happens :P

Cream of Mushroom Soup  (adapted from Joy the Baker, a blog I highly recommend you add to your reading list)

Ingredients: 

2 tablespoons olive oil
1 medium yellow onion, chopped
3 garlic cloves, minced
1 pound cremini mushrooms, cleaned and sliced
1 tablespoons soy sauce
1 tablespoon Worcestershire sauce 
coarse ground black pepper
3 cups vegetable broth
salt to taste
3/4 cup half and half or cream (check blog link for vegan instructions)


1. Chop a medium sized yellow onion and mince 3 cloves of garlic.


2. Wash 500 grams of cremini mushrooms and slice. 


3. In a large pot, warm 2 tablespoons of olive oil on medium-high heat.
4. Add onions and saute in oil until translucent and slightly browned. 
5. Add garlic and saute for 1 minute. 


6. Add sliced mushrooms, soy sauce, Worcestershire sauce (do not skip the soy and Worchestershire - the aroma is heavenly!), and black pepper and allow the mixture to cook for 5 minutes. 


7. Next add 3 cups of vegetable broth and allow the mushrooms to cook at a simmer until tender when stabbed with a fork. Approximately 10 minutes, but the best way to judge in my opinion is with the fork.


8. Once cooked through remove from heat. Using an immersion blender, blend the concoction. Alternatively you can use a food processor, check blog instructions for how to do this.


6. Add 3/4 cup (or as much as desired) of cream as much as  to the mixture. I added less than 3/4 cup (eye-balled it) since 3/4 cup seemed like a lot, this is a personal taste, how much creaminess to mushroom-ness you like.


The blog indicates to strain the soup to remove the clumps from the soup, but I prefer it clumpy so it was served like this.

I hope you try this recipe, it's fantastic!


Monday, May 20, 2013

Pork Meatballs in Broth

I tried another recipe on Friday night, adding more diversity to our weekly menu.  I used a recipe from this blog which also links back to a blog she was inspired from.  This recipe is a version of Nigel Slater's (apparently a well known chef in the UK) Chicken Broth with Pork and Kale from his book Tender. Um yeah, I need to do some more research on Nigel Slater.

Variations I made in comparison to the two blogs linked above are: I used vegetable broth from Eatly (still have some leftover!) instead of a homemade broth.  My chilies were green instead of red (not sure it matters, you want something spicy, but not overwhelming), I did not add kale or zucchini, just plain old meatballs and broth. I fried my meatballs as directed by the original recipe, but deviates from the original blog I found this from.  It would be worth trying simply steeping the meatballs as this cuts down the amount of cooking time and fat in the dish.  As I'm not very savvy in picking meat here in the Netherlands, I suspect I used full fat pork meat... would be worth seeing if I can get a leaner meat as well.  

Pork Meatballs in Broth
1. Add pork into a large mixing bowl
2. Finely chop chilies and add to mixing bowl
3. Slice scallions (discarding the roots and very darkest tips of the leaves) and add to mixing bowl. 
4. Mince the garlic and add to mixing bowl. 
5. Chop mint and parsley (I included the stems of the parsley, but used only mint leaves) and add to the mixing bowl (note, I chopped coarsely per blog's instructions, I will be modifying this the next time and chopping finer). 
 
6. Using your hands, mix thoroughly and form meatballs (recipe recommends 1.25 inches in diameter, basically make them bite size or whatever size is comfortable for you. I plan to modify the next time and make them much smaller). 
7. Bring the vegetable stock to a boil (season additionally if needed).  
8. Heat a thin slick of oil in a pan (I used a stainless steel pan, you can also do this in a cast iron pan) and cook the pork balls until each side has been cooked (and browned slightly).  Not more than 5 minutes. Cook in batches as needed. The meatballs do not need to be fully cooked as they will cook further in the broth.
9. Lower the cooked pork balls into the broth and cook on a low-medium heat for 5-10 minutes until the pork balls are cooked through (I checked by pulling one out and cutting through to check for pink meat).  Serve immediately. 


You can see some of the herbs fell loose from the meatballs, one reason to chop finer to more easily incorporate the ingredients.  On the other hand, we actually liked the herbs floating around as it gave a nice flavor to the broth combined with the richness of the meat.  You can make the meatballs ahead of time (I had them prepared a couple of hours before I fried them up)... I would imagine they could be frozen, but I haven't tried that yet myself. 

The flavors of the spicy chilies combined with the mint and parsley came through beautifully in this recipe.  After letting the broth sit for a while, the spicy chilies became more pronounced in the broth which was a lovely touch.  I especially loved getting bits of mint and I think this recipe would do well with a touch of cilantro too! If you are looking for something new, this is a great recipe.  Compare with the other blogs I've linked to to see how you would like to make your soup!


Saturday, May 18, 2013

Basil Deviled Eggs

At the friendly nudging of my husband, I've been trying to incorporate new foods into our weekly menu more often. I track many food blogs and through Google reader (for the moment) star those that sound interesting to me. Correct or not, I choose recipes based on my access to the ingredients listed, its general ease (n techniques I am familiar with or willing to learn), and how good it sounds (unfortunately I am also influenced by the food photos too).  This recipe is from this blog, which I only started following recently, however rather than pesto I used a basil and olive oil blend. Obviously you could tone down the amount of basil here, but as it turns out I really enjoyed the massive amount of basil!


1. Blend basil and olive oil. 

2. Hard boil eggs for 9-10 minutes if you want them to be a little underdone like mine. I used my fingers to remove the yolk and they peeled out just fine even though they were slight underdone. 

3. Scoop out the yolks and add them to the basil-olive oil blend.

4. Add a spoonful to each egg and you have basil deviled eggs!


Personally, I think these would be fun for Easter, and you could easily tone down the basil for a more pastel green. 


Saturday, May 11, 2013

Argo

Good morning! 

Our Italian golden retriever enjoying cuddles in the morning... what a heart breaker!

Savory and Sweet Crepes for dinner!

Tonight we had savory and sweet crepes for dinner and they were fabulous, definitely one of my favorite meals!  Crepes have been on my mind since last weekend... we've been trying the strawberries from the fresh market and they don't seem to last very long.  In that situation I generally cook them down and make a jam out of them (although I don't preserve the jam since I almost never cook enough to have much in the way of leftovers).  Well last weekend, we ate of the strawberries, so this weekend I decided I would buy a big bucket of Holland strawberries and make a jam.  I plan to use the extras for a yogurt topping during the week... yum! Since it was pretty late and the batter for the crepes needed to sit for 2 hours (gah!), we decided to have savory and sweet crepes for dinner instead of breakfast. Here are some photos.

(Note, crepe recipe used was from Mastering the Art of French Cooking by Julia Child, all prepared and cooked by my husband, can take no credit there!)

For the savory crepes I steamed some asparagus and then sauteed them in butter, salt and pepper and melted gruyere cheese over half of them.
White and Green Asparagus

Savory crepes
 For the sweet crepes, obviously we did the strawberry jam!  Yum!

Strawberry Jam
Sweet crepes

Here are some lovely peonies I purchased at the fresh market to brighten your day! 

Friday, May 10, 2013

Apartment Organization - Kitchen

One of my biggest frustrations in Italy was the lack of organization in our apartment.  Honestly, we tried really hard, but the limitations imposed by the landlord and the stuff she considered part of the furniture rental restricted us a great deal.  Ultimately when we moved out, a huge weight was lifted off our shoulders and I knew we'd have the chance to improve in the Netherlands.  

In moving here I have felt from the very beginning that the Netherlands represents a blank slate for us for home organization and it is becoming a reality.  In just one month of living here, we've leaped so far ahead of where we were in Italy.  In this post, I want to show you some of the ways we have managed to clean up our life, declutter (to the best of our ability), and organize! Unfortunately, I don't have many before pictures as I didn't think I'd be writing a blog post on it... !

This will be a multiple part post so I can describe why I chose to organize.  You may not agree, but this is what works for me.  Today's post will focus on the KITCHEN. 

I love anything food and, as you might imagine, I also like to cook.  One of our criteria for the new apartment in the Netherlands was to have a full kitchen.  Well...the apartment we ultimately chose (for other very good reasons) came with a small kitchen, but we accepted the kitchen's size because there was plenty of room to expand and make it our own.  Shortly after we acquired a car we headed to IKEA to see what was available.  I already had ideas in my head, but when we arrived in the kitchen section at IKEA we saw this beauty and our dreams inflated quickly.

IKEA dream kitchen island
This picture isn't great as it wasn't intended to be published, but there are three sets of drawers that can be customized with the typical IKEA organization stuff and the back side includes an eat-in/breakfast area.  We saw the price that was placed on the top of the unit and assuming it was the total price we decided that with our relocation money this was a great solution to our problem.  Well, not so fast my friend...the next day, after measuring the size to ensure it would fit as we desired in our kitchen, we went back to IKEA to purchase it.  After pricing it all out, it turned out that the price published was only for the counter top and two sides (which are counter tops, just mounted on the side)... adding the cabinets puts the whole thing somewhere way above what we were willing to spend!  Oh man, I was frustrated.  We went through a couple more iterations to try to bring the price down, but then we were reminded that this thing needs to be nailed into the ground or the side wall.  Of course, we don't have permission to do anything to to the walls and certainly not the floor... double frustration! The gentlemen helping us were very nice and showed us some pre-fabricated items that we could purchase that could address our problem.  We chose one of these and have set it up in our kitchen.  Technically I think it should also be nailed into the ground or side wall, but I have put heavy things in the bottom to stabilize it.  The drawers are not dampened (which was a nice feature of the other island), and they sometimes slam shut jiggling the island a bit, but it seems to be ok.  As you can see, it does have an eat-in/breakfast area, but we need to purchase chairs still, ha!


new kitchen island - side view
new kitchen island - front view

So, what have I done to organize the kitchen?  First and foremost, it was incredibly important to me to have the spices visible and readily available.  Originally, in the island we first chose there was essentially this solution, but you had to buy the plastic/rubber holders so the jars stay in place.  Obviously, those won't work for this pre-fab unit, but I implemented the same idea here anyway.  It's not perfect in that I can't fit all of the same type and size of jar I want and fill the whole thing up uniformly, but it works and I can fit in my other non-conforming spice containers :D.  The spice jars are also from IKEA which we purchased while in Italy (note, in Italy we had them hanging on a rack where they could also be seen easily, but we only had space for one rack which was not enough).   Obviously this has a limit and to be honest we are above this limit (that is, I have extra amounts of these same spices that need to be stored).  For now, I have them neatly packed away sitting on top of the fridge. 

spices in kitchen island
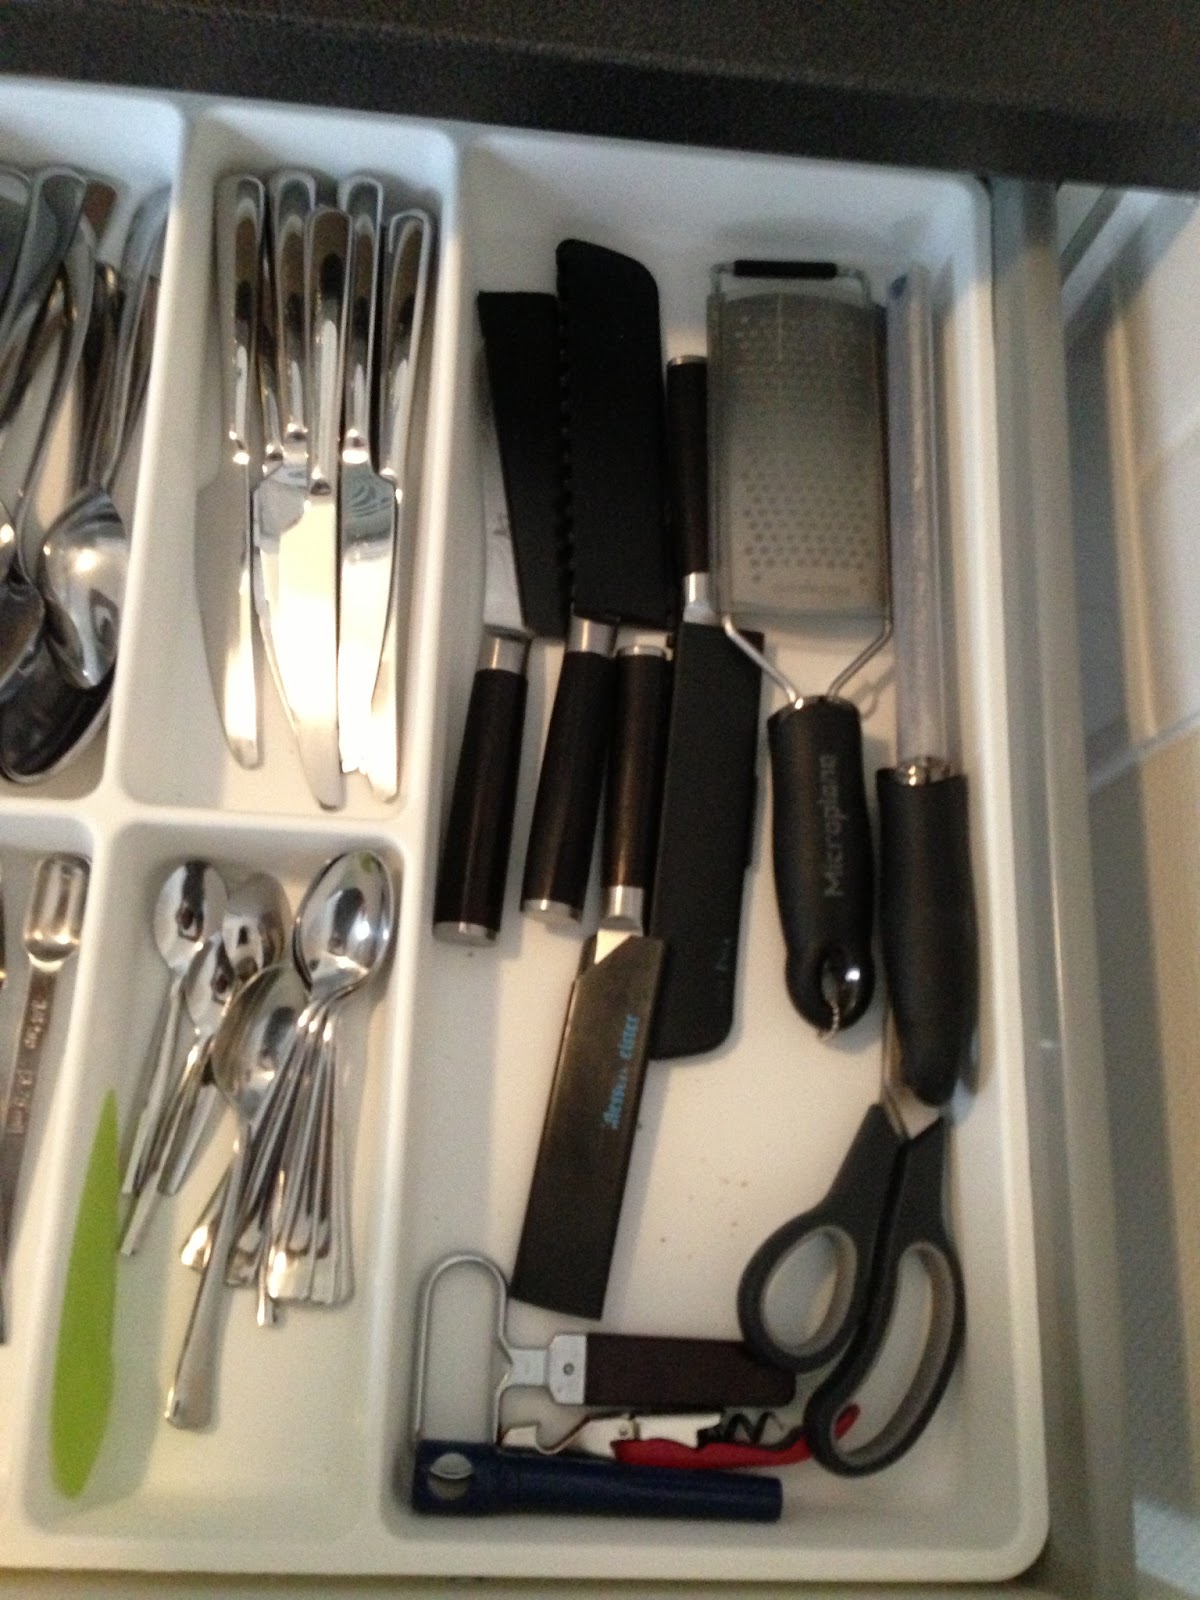
Next, knives.  My husband is in love with knives and I have been blessed by this fascination.  We have so many that to pile them on top of each other in the available space next to the utensils was not, well, organized (we did this for a short while before the kitchen island was purchased)! I have split them by size (short and long). The long ones are in the island where I do most of my chopping, and the shorts ones remain in the area next to the utensils.  For the most part there is only one layer of knives, which means I can see what I have! We are currently discussing a knife block, which could also solve this problem (but takes up precious counter space).  Since it's probably a decision that will take time and research, this is a solution I am happy to live with even if we decide against the knife block.

old knife storage - next to utensils, piled on top of each other
new knife storage location 1 - next to utensils
new knife storage location 2- kitchen island
 Ok, onto storing things in open faced & top jars.  First, using clear jars or partially clear jars is a great to be able to see what you have.  Second, using the same size jar makes it easy to organize.  The bottom left hand is filled with the jars I have re-purposed.  These jars do not have clear tops, so I've laid them on their side.  I use them for lentils, grains (such as quinoa, orzo, cous-cous, etc), dried chillies, and large spices (such as cardamom), but I'm sure you could find other uses.  As you can see I had extra space for other things that can fit for now.  I intend to put more clear jars there as soon as they are available.  I eat rice to often to use these, rice is in the larger jars and sit with the jars where the pasta and oats are stored.  These are placed on our window sill for now...
Re-purposed clear face jars for lentils, quinoa, cous-cous, etc.
Long Jars on window in kitchen

For jars that are not clear (so for example, canned beans, corn, other vegetables, tomato paste, etc).  Again, the key here is to be able to see what you have.  I have turned them on their side and placed them in the drawer with the label face side up (and you can see the extra things that made it in because there was room!).  I loose a layer of storage doing it this way, unless I place the same items on top.  However, with the sliding top drawer that I use for the knives, it's not possible to have another layer, so one layer it is!  What it means is that I can't really buy extra beyond what you see.  In some ways this is good for us, I only purchase what we need.  In other ways it can be frustrating.... what if there's a sale, then where do I store my extras?  TBD on that!

canned bean storage
canned bean storage, canned veggie storage, etc.

The other drawers aren't organized well enough yet. I plan to post on these later.

Other storage - in the original kitchen.  Well, I've tried this shelf system I purchased at IKEA to make extra space and to provide better visibility of what's there.  Here's what I've done for the dishes so far.  By placing the plates on top of each other using the metal shelf, I opened up room for the bowls. I've done something similar for the top shelf items (this is a narrow metal shelf).  By placing the sugar and milk holders on the bottom, I've been able to place the soy sauce, little bowls, and egg holders in a visible and reachable spot.  Behind the grey-ish bowls are extra egg holders that I should only need when more people are eating with us so I'm comfortable with them being unapproachable for the time being.


Since purchasing these I've decided to implement them in the right side pantry of the original kitchen, look for a post on that soon.

unorganized pantry away a metal shelf or two!
Clearly there are areas that still need work (we've only been in the apartment a month!) and there are still boxes on the ground that need to be dealt with.  For now, the island has dramatically helped us feel more comfortable with this kitchen space and has allowed us to find ways to organize our kitchen items.  I think I'll plan for more kitchen posts as we finish the rest of our unpacking, live with our organization choices, and most importantly use our kitchen items to cook (and possibly make fabulous meals)! 

First Post... New Beginnings!

First post, fresh start, blank slate.  I've started a blog before, but out of my own laziness it didn't go anywhere.  I have only myself to blame for that ... I found it really difficult to find the motivation to look at a computer after having spent all day doing just that.  Well, I am trying again... fresh start, blank slate! This blog does not have a particular theme, it's a place for me to write about my life, my frustrations, my moments of joy, and maybe occasionally to let our friends and family in the States and Italy know what I am up to here in the Netherlands and wherever else life brings me!  Inspired by the many food and family life blogs I currently follow, I hope this blog can serve as as sort of memory 'book' that I imagine is fun to reflect on as life changes.  Cheers to new beginnings!